


The AeroPress stands out among different coffee brewing methods as an exceptional choice for coffee lovers seeking a blend of convenience and versatility. Renowned for consistently delivering exceptional cups of coffee, this compact brewer has amassed a devoted following among passionate coffee enthusiasts worldwide. Whether you're new to AeroPress or a seasoned user, its innovative design and wide range of brewing possibilities make it a must-have tool in your coffee brewing arsenal.


The AeroPress is a compact and innovative coffee brewing device invented by Alan Adler in 2005. It has gained immense popularity among coffee lovers worldwide for its simplicity, versatility, and ability to produce rich and flavorful coffee.
AeroPress - Clear Coffee Maker
AeroPress Clear Coffee Maker unlocks your coffee brewing potential with its crystal-clear, shatterproof Tritan construction and unrivaled brewing capabilities. It produces a smooth, flavorful, and grit-free cup of coffee that surpasses the limitations of other brewing methods. Whether you're an avid traveler, a camping enthusiast, or seeking the perfect gift, the AeroPress Clear Coffee Maker is your gateway to a delightful coffee experience that will leave you impressed with every sip.

This comprehensive guide will walk you through the art of AeroPress brewing, providing step-by-step instructions, techniques, and tips to help you achieve the perfect cup of coffee. Whether you're new to AeroPress or an experienced home barista, this guide will equip you with the knowledge and skills to elevate your coffee brewing experience.
The AeroPress offers a unique approach to brewing, combining immersion and pressure extraction to unlock a wide range of flavor profiles. It's compact design and simple operation make it an ideal brewing method for home and on-the-go use. So, grab your AeroPress, select your favorite coffee beans, and embark on a journey to explore the wonderful world of AeroPress brewing.
HEXNUB - AeroPress Organizer
The AeroPress Organizer is the ingenious solution for coffee lovers who want to keep their AeroPress coffee maker and all its accessories neatly organized.

- This caddy station offers a space-saving and stylish storage solution with its premium-grade bamboo construction.
- Measuring a compact 11.8" W x 7.8" H x 4.6" D, this sleek organizer fits seamlessly into any kitchen, coffee shop, or office space.
- Designed with functionality in mind, the HEXNUB - AeroPress Organizer holds all the essential components of your coffee maker kit.
- The heat-resistant silicone mats not only catch any spills or drips but also serve as a convenient drying station for the parts.
- HEXNUB offers a 30-day full money-back guarantee with every purchase.
Let's begin by understanding the components of AeroPress and the principles behind its brewing method.
Understanding the AeroPress
To fully appreciate AeroPress and its brewing method, it's essential to understand its components and the principles that set it apart. Let's dive deeper into the inner workings of this remarkable device.
The AeroPress consists of three main parts:
- The brewing chamber,
- The plunger,
- And the filter cap.
The magic happens in the brewing chamber—it holds the coffee grounds and water during brewing. This section is made from durable BPA-free plastic and is designed to withstand heat and pressure.
Connected to the chamber is the plunger, which fits snugly inside. The plunger is responsible for creating the necessary pressure for extraction. With a rubber seal at the end, it forms a tight seal against the chamber walls to prevent coffee from leaking during brewing.


Completing the AeroPress is the filter cap, which attaches to the bottom of the chamber. It holds a micro filter that ensures a clean coffee cup by capturing fine particles and sediments. The filter cap also doubles as a convenient stand to support the AeroPress when not in use.


What sets AeroPress apart is its unique brewing method that combines immersion and pressure extraction. Unlike traditional pour-over methods, AeroPress immerses the coffee grounds in water for a specified period. That allows for thorough extraction, resulting in a rich and robust flavor.


Once the desired steeping time has elapsed, the plunger is pressed down, creating pressure that pushes the brewed coffee through the microfilter and into your cup. This pressure extraction contributes to the AeroPress's signature characteristics—cleanliness, clarity, and full-bodied flavor.
Combining immersion brewing and pressure extraction gives you control over the extraction process, allowing you to experiment with different variables to achieve your preferred taste. This versatility and AeroPress's ability to produce outstanding results have made it a favorite among coffee enthusiasts.


Now that we have acquired a comprehensive understanding of AeroPress and its unique brewing technique let's move forward and explore the essential preparations necessary to brew coffee using this remarkable device. These steps will enable you to embark on a delightful AeroPress brewing experience.
Preparation Steps for AeroPress Brewing
Start by choosing high-quality coffee beans that suit your taste preferences. Opt for freshly roasted beans to ensure maximum flavor. The AeroPress is versatile and works well with various roast levels, so feel free to experiment.
Selecting and Grinding the Coffee Beans
Start by choosing high-quality coffee beans that suit your taste preferences. Opt for freshly roasted beans to ensure maximum flavor. The AeroPress is versatile and works well with various roast levels, so feel free to experiment.
San Francisco Bay Whole Bean Coffee - Fog Chaser Blend
San Francisco Bay Whole Bean Coffee's Fog Chaser Blend is a delightful medium-dark roast coffee with a perfect combination of flavor, balance, and smoothness.

- It is made with 100% Arabica coffee beans, certified Kosher, and grown in high altitudes.
- Blend of dark and medium roasted beans for a satisfying taste.
- San Francisco Bay offers sustainable and eco-farmed whole-bean ground coffee options.
- Family-owned American company with a commitment to quality and customer satisfaction.
Once you have your beans, it's time to grind them to the appropriate size. For AeroPress brewing, a medium to medium-fine grind is generally recommended. Also, try to adjust the grind size according to the roast level of the beans. Lightly roasted beans should be ground to medium-fine, while darker roast grind to medium. Grinding your beans just before brewing ensures optimal freshness and flavor.
Hario Ceramic Coffee Mill
Hario Ceramic Coffee Mill is a budget-friendly hand grinder perfect for beginners and pros.
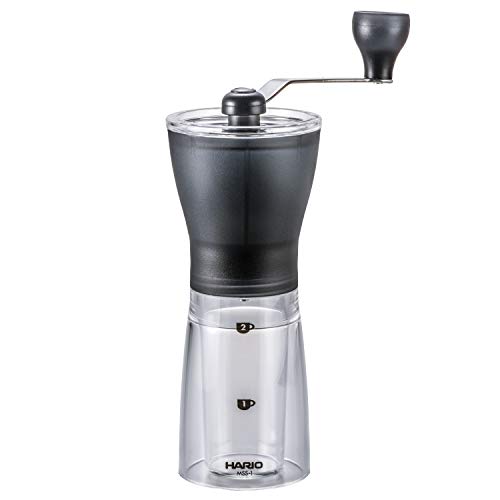
- Slim and compact design that makes it perfect for home and travel use.
- It has a capacity of 24g of coffee and dimensions of W150×D72×H220mm.
- Ceramic conical burrs ensure a precise and uniform grind and transfer less heat to the coffee beans.
- Ergonomically designed crank handle detaches for compact storage and easy travel.
- Designed by Hario in Japan to provide coffee lovers with easy access to freshly ground coffee.
Preheat Water for Brewing
Before you begin brewing, it's important to preheat your water. Simply boil a bit more water than you'll need for brewing and let it sit for a minute or two to cool slightly. Consider using filtered or freshly drawn cold water to ensure you're using good-quality water for your AeroPress brewing.
If your tap water has noticeable off-flavors or odors, using a water filter or purchasing bottled water can be alternatives. By prioritizing water quality, you're taking an essential step toward unlocking the full potential of your coffee beans and elevating your AeroPress brewing experience.
Mecity Professional Electric Kettle
Designed with precision and elegance in mind, this 27oz (800ml) electric kettle allows you to select the ideal temperature from 100°F to 212°F (38°C to 100°C).
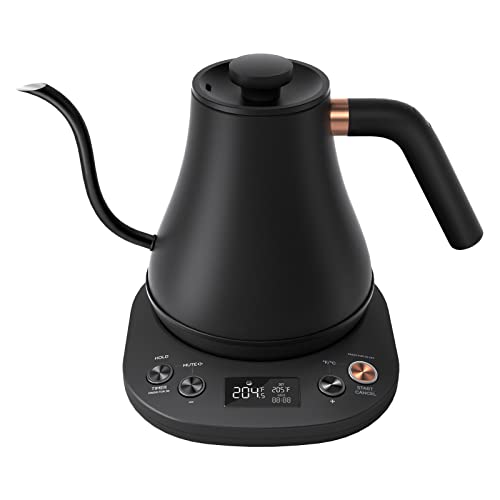
- With their advanced thermostat and 2.0-inch LCD display, you can easily monitor and control the real-time temperature, set temperature, hold time, and more.
- The kettle has multiple protection features, including an anti-dry function and automatic shut-off mechanisms. The insulated handle and the heat-resistant lid ensure safe handling.
- Made from BPA-free material and food-grade 304 stainless steel, you can enjoy pure-tasting water without worrying about harmful substances leaching into your beverages.
Assembling the AeroPress
Now that your coffee beans and brewing water are ready, it's time to assemble the AeroPress. Begin by placing a paper or metal filter into the filter cap. If using a paper filter, wet it with a bit of hot water to remove any papery taste and help it adhere to the cap. Screw the filter cap onto the bottom of the chamber securely.
AeroPress Filters

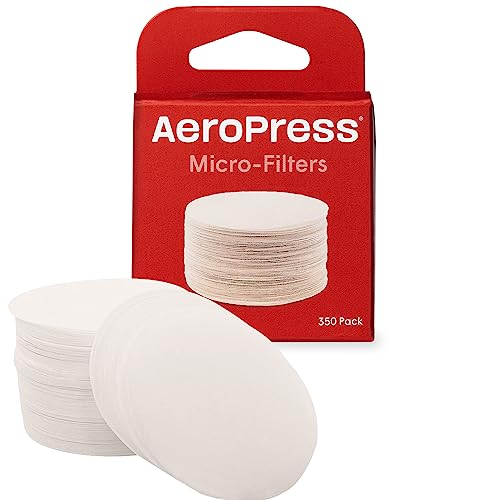
AeroPress Replacement Filter Pack
Elevate your AeroPress brewing game with the AeroPress Replacement Filter Pack. Experience the joy of consistently clean and delicious coffee, unleash your creativity, and become your own barista. Enjoy the convenience of easy-to-use filters and the assurance of a brand that values innovation and quality.
- Easy to Use: The AeroPress filters are incredibly user-friendly and ready to use straight out of the box. Simply insert the filter into your AeroPress coffee maker, and you're ready to brew. This pack contains 350 filters, each measuring 2.5" in diameter, ensuring long-lasting convenience and quality.
- Purest Coffee: Experience the purest and particle-free coffee with our micro-filters. Designed specifically for AeroPress coffee makers, these micro-filters play a crucial role in ensuring a consistently grit-free cup of coffee.

CAFE CONCETTO Titanium Coated Stainless-steel Filter
Take your AeroPress brewing game to new heights with the CAFE CONCETTO Titanium Coated Stainless-Steel Filter. Designed to deliver exceptional performance, control, and effortless brewing, this filter is a must-have for coffee enthusiasts seeking to enhance their AeroPress experience.
- Crafted from high-strength stainless steel and titanium coated for extended durability and an exquisite finish, this filter is built to last. Using this reusable filter can save on thousands of disposable paper filters, contributing to a greener planet and a more sustainable approach to coffee brewing.
- CAFE CONCETTO, an independent brand based in Glasgow, UK, embodies a commitment to sustainability, good design, and the philosophy that less is more. They strive to create coffee accessories that enrich your daily life with durability and style.
- Rest assured with the 💯 LIFETIME GUARANTEE that comes with this filter. CAFE CONCETTO stands behind the quality of their product, offering a 100% no-questions-asked lifetime guarantee.
With your AeroPress assembled, it's time to move on to the brewing process.
The AeroPress Brewing Process
Now that your AeroPress is assembled and your coffee beans are ready, it's time to delve into the exciting brewing process. Let's walk through the step-by-step process of using AeroPress to brew a delicious cup of coffee.
- Adding Coffee: With the cap and filter already screwed on, start by placing the AeroPress on a sturdy mug or decanter with the chamber facing upwards. Remove the plunger from the chamber, ensuring the rubber seal is intact. Measure the desired amount of coffee according to your taste preferences and AeroPress's capacity. The recommended coffee-to-water ratio for AeroPress brewing is 1:15 to 1:17, meaning 1 gram of coffee for every 15 to 17 grams of water. However, feel free to adjust this ratio based on your desired strength. For example, add about 12.5g of coffee grounds into the chamber and brew it with 200 ml of water for a 1:16 coffee-to-water ratio. After you drop the grounds into the brew chamber, shake the brewer slightly to spread and level the coffee evenly at the bottom.


- Adding Water and Agitation: Once the coffee grounds are in the chamber, it's time to add hot water. The water temperature plays a crucial role in the extraction process. For optimal results, use water that's just below boiling point, around 195°F to 205°F (90°C to 96°C). Pour a small amount of water onto the coffee grounds, enough to saturate them. This initial pour allows for the blooming process, where the coffee releases its trapped gases and flavors. After a few seconds, gently stir the mixture with a spoon or paddle to ensure even extraction.


- Brew Time: After stirring, pour the remaining water into the chamber, totaling 200ml and achieving a coffee-to-water ratio of 1:16. Place the plunger on top of the chamber but do not press down yet. Let the coffee steep for a preferred time, usually around 1 to 2 minutes. Adjust the brew time based on your preferred strength and flavor profile. The coffee extracts its flavors and aromas during this time, creating a rich and vibrant brew. Feel free to experiment with different brew times to find your perfect balance. After a couple of minutes have passed, gently swirl the brewer so the crust of coffee formed at the top starts to break and the grounds sink to the bottom of the chamber.
- Pressing the Plunger: Now comes the exciting part—pressing the plunger to extract the brewed coffee. Maintain a steady and controlled pressure as you push the plunger downwards. The extraction process should take around 20 to 30 seconds. The pressure applied during this stage contributes to the unique characteristics of AeroPress coffee—cleanliness, clarity, and a full-bodied flavor. As you press down, you'll notice the coffee being forced through the microfilter and into your cup or serving vessel. Continue pressing the plunger until you hear a hissing sound or until the plunger reaches the bottom of the chamber. That indicates that all the coffee has been extracted, leaving behind a compacted puck of coffee grounds.


Once the extraction is complete, carefully remove the AeroPress from your cup or vessel. Unscrew the filter cap and eject the coffee puck into the trash or compost.


Take a moment to appreciate your freshly brewed AeroPress coffee's rich aroma and beautiful color.
Congratulations! You've successfully extracted a cup of delicious coffee using your AeroPress.
Serving and Enjoying
Now that you have a freshly brewed cup of AeroPress coffee, it's time to savor the flavors and indulge in the delightful experience. Let's explore the final steps of serving and enjoying your brew.
- Dilution (Optional): Depending on your preference, you may enjoy your AeroPress coffee as is or dilute it with hot water. If you prefer a stronger concentration, you can skip this step. However, if you like a milder cup, simply add hot water to your brewed coffee until you reach your desired strength.
- Customizing with Milk or Sweeteners (Optional): AeroPress coffee is versatile and can be enjoyed in various ways. If you prefer coffee with milk or a sweetener, now is the time to add them. Whether it's a splash of milk, a dollop of frothed milk, a drizzle of flavored syrup, or a sprinkle of sugar, feel free to customize your coffee to your liking.
- Experimenting with Brew Variations: The AeroPress provides ample room for experimentation. Feel free to try other brewing recipes and use different coffee beans, grind sizes, water temperatures, and brew times. Each adjustment can yield unique results and expand your coffee horizons. Keep a record of your brewing parameters and take note of the combinations that resonate with your taste preferences.
- Cleaning and Maintenance: After enjoying your coffee, cleaning your AeroPress for future use is essential. Simply unscrew the filter cap and push the plunger to eject the coffee grounds into the trash or compost. Rinse the various parts under warm water and use a gentle brush to remove any residue. The AeroPress is dishwasher safe (top rack only), but handwashing is recommended to prolong its lifespan. Periodically, it is recommended to remove the rubber seal from the end of the plunger and thoroughly clean it. Detach the seal and wash it inside and out with warm water and dish soap.
By mastering the AeroPress brewing method and exploring its endless possibilities, you can elevate your coffee experience and discover new depths of flavor.
Read Next: A Coffee Brewing Guide: Cold Brew